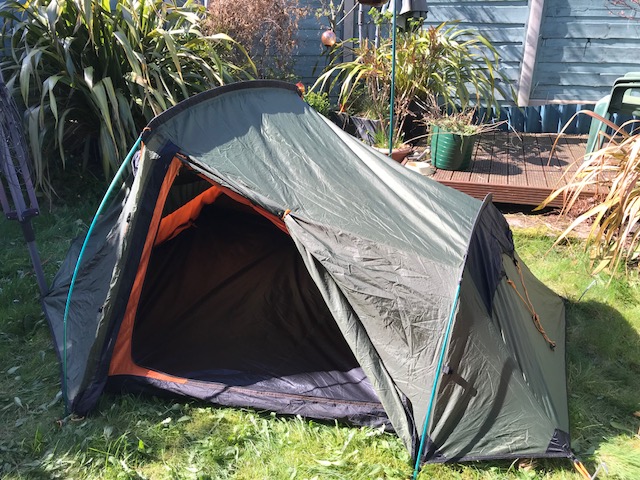
You might remember that I bought a second-hand Vango Banshee 300 last year which I had to reproof. Well, after the success of the top, I have managed to finally get around to reproofing the groundsheet as well. After a few requests following the last ‘how to’ that I posted, I am creating another video as well.
Next weekend is the Outdoor Bloggers camp and the reason that prompted me into reproofing action. That and the fact that we have a couple of days of sunshine. Any excuse to be outside, right?

How to reproof your tent groundsheet with Grangers Fabsil
The first thing that you have to ensure is that you will have some really dry weather to get the job done. The reason for this is that you need to give the tent chance to dry without moisture from rain or dew breaking the seal. So if you choose a dry day and get out early, you can do it in a day.
In this how-to, I am going to show you how to reproof the groundsheet of your tent. Mine is attached to the flysheet and I pitch it with it attached (speedier) which also makes it mush easier for reproofing as it is already lying on a waterproof mat. So here goes, let’s reproof your tent groundsheet.

Equipment:
Your tent and groundsheet
Grangers Fabsil (available in Go Outdoors)
A glass bowl or old tuppaware
Medium/large clean paintbrush (preferably new or only used for reproofing)
A bowl of warm water
Clean sponge
Small towel or other absorbent dry cloth
Rubber gloves
Step 1: Pegging out
Now that you have chosen your dry day, you need to make space in the garden to lie your tent and groundsheet flat. Lie it on the outer with the groundsheet facing up towards the sky. Peg down the corners, making sure to pull it out to remove as many creases as possible. It will still be creased, especially if your groundsheet has the bowl shape at the bottom, but it is fine as you’ll be able to stretch it out while you work the proofer over the groundsheet.

Step 2: Cleaning
As you can see from my groundsheet, there is still some remaining muck on it after my last camp. To make sure that there is a clear and good base for the reproofer, you must first clean and dry the surface. To do this, fill a bowl with clean warm water. Do not use any products or washing up liquid as this can also affect the proofing. Use a clean sponge to work your way over the surface, removing any grit, mud and other particles that are on the groundsheet.

At this point, you’ll also be able to identify the bits that are the most leaky, or wetting out as it is called. Wetting out occurs when the fabric is holding onto the water instead of it rolling off or evaporating quickly. My tent had some large patches which you can see by the darker areas in the picture below.

Now that you have cleaned the groundsheet, you will need to leave it to naturally dry. I found that wafting it up around the wetting out areas helped it to dry a little bit faster. My Banshee only take about an hour – which gives you time to do some gardening or other camping gear prep while you wait.
Step 3: Reproofing your tent groundsheet
Once completely dry, the you are ready to reproof your tent groundsheet. For this bit you will need your Grangers Fabsil, rubber gloves, glass bowl and paintbrush. Pop on your rubber gloves and pour some of the Fabsil into the glass bowl. I tend to do it in smaller batches so that I don’t have any left over at the end of the reproofing session. Just refill as you go along.
Start in one corner of the groundsheet and work your way around. Make sure you keep a “wet edge” to paint up to. A “wet edge” is the wet line that you get between sections. Making sure you keep painting to the wet edge means that you get a solid seal with no breaks. This will make sure that everything is fully coated in product and waterproof.

Systematically work your way around the groundsheet making sure to paint around the folded edges as well, by picking it up off the top sheet.
Once it is all covered, I like to go over it one more time with my paintbrush and a little bit of the remaining product to check that I have covered the surface completely. Use brushstrokes in a different angle – like you would when painting a wall – to fill in any tiny gaps that might have been missed.
Step 4: Rubbing down
You might notice some areas have a lot of product on them. It is usually in the creases or where the ground beneath the tent drops down a little bit. To make sure that you don’t have an excess of product at any point on the tent groundsheet, wipe over the areas with the clean dry cloth. Use a motion that spreads the solution around. Make sure that you do this before the reproofer has had time to dry so that it spreads evenly onto the damp fabric.

You’ll notice that the groundsheet is now dark and glossy with no uneven tones like the ones you had on the washing stage. This is a good sign that you have covered it well and the solution is evenly spread onto the groundsheet.

Step 5: Leave to dry
It is during this stage that you need to make sure that the groundsheet stays completely dry. Water touching it breaks the bond of the reproofer and creates a leak. If you ever camped in old canvass tents, you might remember how if you touched the canvas on a really rainy day it would leak through, leading you to rub your finger all the way down to create a line to the ground. Well, the wet on the damp proofer will have the same effect, so make sure it stays dry.
I like to leave my tent to dry naturally for about 6 hours to make sure that it is completely dry before packing away. Depending on weather conditions, yours might take a little less time. The average time is around 4 hours.

Step 7: Pitching (and reproofing the tent)
This step is optional really, but one that I recommend while you have the tent out. As you’re doing some essential maintenance on your tent, it is worth checking the other side and giving it a bit of a clean while you’re at it. This will make sure that it is camp ready.
Pitch the tent and give the insides a good sweep. It always amazes me how much grit and sand gets in there. Check the seams and guy ropes. If you haven’t already reproofed the tent, then this is a great opportunity to do so. Also check your guys, pegs and other pieces of kit to make sure that they are intact and ready for your next trip.
If you would like some help for reproofing your tent, check out my guide “How to reproof your tent with Grangers Fabsil”
Step 8: Pack away
The final part of the process is to pack away your tent, pegs and kit. Make sure to wash the reproofing kit thoroughly. I have created a small box to keep all of my outdoor reproofing stuff in so that it is handy when I need to do some maintenance in the off seasons. Once packed away, it is time to start planning your next camping trip! I’m lucky that mine is at the end of the week!

So there you have it! That’s how to reproof your tent groundsheet with Grangers Fabsil. It is much easier than you would think and really prolongs the life of your tent and groundsheet – keeping you nice and dry on your trips too.
Have you reproofed your tent before? Would you like to see more tutorials on how to keep your kit going for longer?
Let me know in the comments!
Oh and otherwise, just let me know where your next camping adventure will be, I’d love to know that too.